

rjjackson
-
Posts
224 -
Joined
-
Last visited
Content Type
Profiles
Forums
Blogs
Events
Downloads
Gallery
Store
Posts posted by rjjackson
-
-
michael, thanks for the quick reply.
seems a common problem, ah? with solutions along the lines of "send it back to canon" and "get a different camera".
one source argues, "Banding is somewhat a fact of life with dSLRs".
gee, after all that, i'll go back to my dark room.
-
ps, i added the red indicators.
-
hello,
<br>
testing out a 400d body for someone recently i noticed some very strange vertical lines, apparently 1px wide,
that consistently cover the whole frame in an orderly pattern. i have seen one line interference like this from
hot pixels, but never in such an orderly pattern. a quick search didn't bring up any similar problems. anyone
know what the problem here is?
<br>
here is a 100% crop with contrast bumped up a bit to show them more distinctly:
<br>
<img src="http://rjjackson.com/images/img/vert_lines.jpg" />
-
tatiana,
i think you're on the right track. i keep a few working 70's slr cameras on hand specifically for loaning out to friends learning to shoot film. while hunting around, there are two bits of advice i would consider. if you're looking at an SLR, consider a body with at least 1/125th /sec flash sync speed. in my opinion, these older manual focus slr's still excel with long lenses as portrait cameras. the second bit of advice i would suggest is to start out with one or two high quality lenses and add to your collection as your budget permits instead of springing for an array of mediocre lenses, especially inferior zooms. the high quality lenses for these older cameras are a fraction of their auto focus counter parts and these will continue to be useful tools. i don't know nikon's lenses, but i usually suggest a 35mm and a 90mm lens to begin.
good luck,
rj
-
<img src="http://rjjackson.com/images/img/fi_35_00347.jpg" />
-
whoa, larry, that's a hairy bald gorilla!
<br>
<img src="http://rjjackson.com/images/img/fi_01135.jpg" />
<br>
this came from a matchbox pinhole with about 1cm shift.
-
cliff,
<br><br>
i have the same camera/lens. i was as pleasantly surprised as you were to find how friendly this camera is to use. fits in the pocket. i haven't put color through it. i wonder what an enhancer filter would do for color saturation. also, i like the contrast in your development. looks good :)
<br><br>
here's a hot outside my flat with the same camera:
<br><br>
<img src="http://rjjackson.com/images/img/fi_01130.jpg " />
-
hi joseph,
thanks for the kind words. for both these shots i made a cardboard camera body that was mounted on top of the film backs (so no mirrors to bother with). for the 4x5, i used the black cardboard 4x5 film box from kodak placed directly over the film holder (19mm deep plus a few for the film seat and foam light seal). works well, very light and packs up nicely among my heavier gear. i'm making the same thing from maple now with changeable pinhole boards for different kinds of shift.
i have noticed that the quality of the hole has a huge effect on the vignetting. also, to some extent, the film and development. i can tame it a little by pulling the development.
the amount of vignetting described as stops, i presume, is on the zone system?
-
hi gasper,
<br><br>
but vignetting is the virtue of pinhole images. in an absolute sense, i think you won't be able to avoid it, but it won't be so strong unless you use very short focal lengths if your material is extremely thin. i guess the exact data you need depends on how thick your pinhole material is. i use .015mm steel shim with a bit of a bevel around the hole.
i'm afraid i can't offer a calculator for the data you need, but here's some examples. here's a picture with 24mm on 6x6, and one with 23mm on 4x5, both at the same place.
<img src="http://rjjackson.com/images/img/fi_00976.jpg" /><br><br>
<img src="http://rjjackson.com/images/img/fi_45_00111.jpg" />
-
jérôme,
thanks for bringing this to my attention. forgive me, the lens was arsat 80mm, not 90. i have a salut and i was used to thinking of 90mm as the normal lens. my mistake.
rj
-
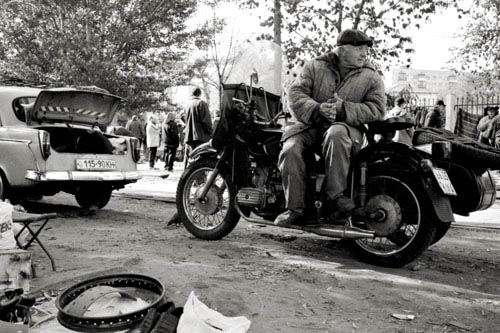
jérôme,
he's checking out my hassy while i was shooting with my friend's kiev. (we were there to get a neckstrap for the kiev). as i understand, the arsat is the renewed lens, i don't know if it is old glass or newly(ish) ground glass. it has purdy coatings and this sample seems to perform well wide open.
rj
-
for "light up the film", read "line up the film"
sorry
-
hi steve,
i have played around with several light leaking folders. it seems that the suspect here is a light leak from the door, perhaps around the hinge. you can light up the film were it stood as you were shooting and start to sort out the angle where the light comes in and then put a bit of thin sticky back felt on the door to seal it up. do you have such exposure on every frame? only when outside in the sun?
rj
-
hi bob,
i have noticed that my kodak negs, double-x, tri-x and tmx, tend to have a bit of a purple or gray tint. be sure you are fixing long enough in fresh(ish) fixer, otherwise you will really get purple negatives.
rj
-
one could argue that a correctly working kiev is itself a peculiarity. have you bench tested your shutter curtains at fast speeds?
<br>
<br>
i shot this on a friend's (correctly working) kiev 88 w/arsat 90 at 2.8 1/30 a few weeks ago at the arsenal factory itself. on occasion, i find "peculiar" complimentary.
<br>
<br>
<img src="http://rjjackson.com/images/img/fi_01356.jpg" />
-
the factory still sells new cameras. that doesn't mean they were fabricated recently. in fact the factory has many parts turned ages ago and these are used to assemble cameras as needed. some improvements were made some years ago at the factory but the refurbishment done by the third parties is more substantial. however all these cameras still suffer from famous peculiarities. it's hit or miss with kiev cameras.
rj
-
hi pittas,
one limitation to consider is that if you are going to use the body and its shutter button your focal length cannot shorter than about 65mm (about 60 degrees angle of view) because the mirror needs room to swing up. if you just want to use the film back and you want wider angles, you can easily find a way to make a special pinhole body to mount over the back and use a manual shutter.
good luck
rj
-
i think jm coetzee has something to say about this, particularly in australia, in his new(ish) "diary of a bad year". it's more than fear, but also diminishing respect for art.
-
i just realized that george must be mentioning the same tool i mention but for a different version. also i am not sure "color range" tool is available in elements. sorry.
-
hi simon,
i think there isn't really a good fast way to do this. however, in addition to the magic wand tool, you might first try the color selection tool: menu > select > color range > fuzziness about 10 or so. you'll have to deselect the colors in the foreground that this method picks up but it will very quickly pick out all the blue area behind green leaves.
good luck
rj
-
the iso describes the sensitivity of the light receiving surface (film or sensor). so if you make the sensor more sensitive (higher iso) it receives more light, and to get the same overall exposure you need to reduce the amount of light by stopping down or increasing shutter speed.
also faster film is usually used for situations with less light. iso 3200 film would be good for indoors at night whereas iso 50 would be good for sunny landscapes. the 800 speed film you got has bigger grain because it is more sensitive (bigger clumps of silver need less light to have a reaction).
hope this helps -- rj
good luck - rj
-
yep this is normal.
run a quick test for light leaks between the back and body. you can email me for specific solutions on this problem if it occurs. otherwise enjoy the camera and all of its peculiarities.
-- rj
-
right. i meant impossible in the sense of entirely possible : ).
-
from my experience, light leaks are more common from loose fittings on the bottom of the back and light comes in from between the back and body. if the back is rather beat up, this could be out of adjustment. a newish back can be found for about 100 bucks -- hardly worth stressing over relative to the rest of the kit you have access to.
a loosely fitting back might also explain the overlapping negatives becasue the teeth from the body might be slipping past the teeth in the back.
can you post a sample of the light leak? i'm curious because if it's on the left side of the image in fact the light comes from the right side of the body, so impossible to be from the dark slide slot.
rj
strange pattern of vertical lines canon 400d
in Canon EOS Mount
Posted
dan, thanks for the post. this test shot meets only one of your requirements (inspected at 100% magnification). this was shot at iso 100, perfectly balanced histogram, and "auto" exposure during raw conversion. it was obvious w/out enhancing contrast and appears on all frames in a similar pattern.
do you think there is a problem with this unit or is this a design flaw in the 400d sensor? this doesn't seem to follow the behavior of noise banding as i saw in the examples revealed by search engines. has anyone else with xti or 400d noticed this pattern?