

khiem_le1
-
Posts
62 -
Joined
-
Last visited
Content Type
Profiles
Forums
Blogs
Events
Downloads
Gallery
Store
Posts posted by khiem_le1
-
-
<p>Great, thanks for the inputs everyone. <br />I guess what was confusing to me was the illumination of the subject, i.e some reflects more than others therefore might look brighter/darker with the same exposure, but looks like it does not matter, and the incident reading will give the exposure just to render the subject perfectly as it should be. </p>
<p>Thanks for the Black & White cat example above, it did help to make more sense. </p>
-
<p>Hello everyone,</p>
<p>I'm at that stage where I find the zone system is very fascinating and am trying to read and understand the basic theory about it (still hasn't finished that book though).</p>
<p>My questions is: when to use the incident or reflective metering of a handheld light meter with subject that has high/low reflectance property. Now, I understand that reflective metering is usually a spot reading, which gives the exposure to render that spot middle gray. But with the incident metering, isn't that the same too? as in: it gives the exposure reading to render the part where we are holding the light meter middle gray?</p>
<p>I find it particularly confusing in this scenario: I am photographing a darker skin bride in a white wedding dress, if I hold the meter in front of the bride's face to take an incident reading, would it give the same reading as if I were holding the meter in front of her dress (given that the light falls on her uniformly). What if that was a brighter skin bride? Still in the same lighting condition and everything, would the meter give the same reading? I suppose it should be the same because the incident meter does not know if it is placed in front of a high or low reflectance object. But if the readings are the same, would it make either the darker skin bride underexposed or brighter skin bride overexposed (or the other way around). I am not sure if I am making sense here as it also sounds this confusing in my head :(.</p>
<p>SO, the bottom line is, how does the incident light meter know if it is placed in front of a high or low reflectance object to give the correct readings to render that object correctly?</p>
<p>With the reflective meter, as far as I can understand the zone system, we may place the reading of the brighter skin bride's cheek in Zone VI, or Zone V for the darker skin bride. Will these two readings be the same as the ones generated by an incident meter?</p>
<p>Thanks</p>
-
<p>Thanks everyone for your inputs. </p>
<p>I suppose the photo above is not that hard to use an incident meter like the 308s to measure the light. But like Andrew and David said above, it is almost impossible to use the 308s when the light is a bit more complicated, eg litting some parts of the scene but not others, or extremely bright where the photographer is standing, etc. </p>
<blockquote>
<p>I see nothing in that scene above that would present any problem for an incident meter-reading. Why complicate things when a simple single incident reading would get you the same result?</p>
</blockquote>
<p>You're right, with the above photo it is not that hard to use an incident meter to meter the light where I was standing. What I think is a bit more difficult is when where I'm standing to take the shot is completely dark or in shade.<br>
Looks like I have to save up a bit more for (probably a used) a spot meter.</p>
-
<p>Hi everyone, </p>
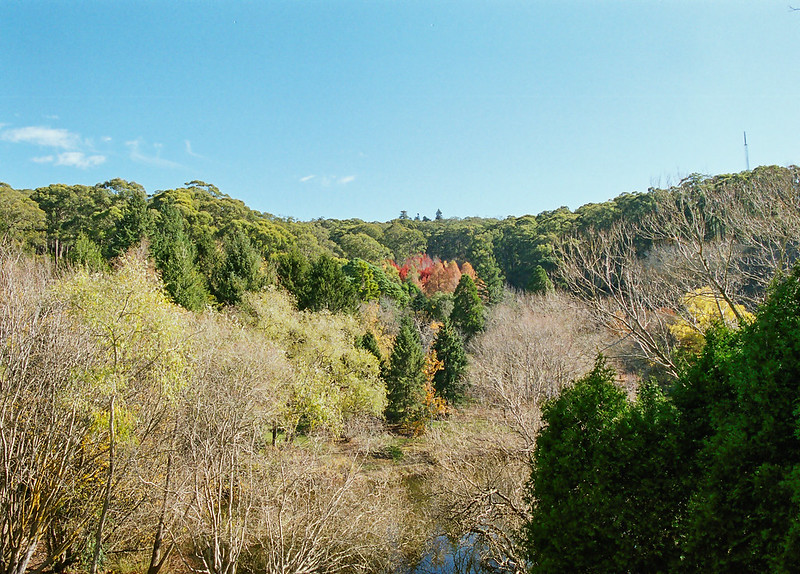
<p>I'm thinking about getting a Sekonic L308s light meter to use together with my film bodies. What I don't quite understand is how would one use the light meter to meter for landscape photography. <br>
For example with this scene: </p>
<p><a title="Lens testing sample image by Khiem Le, on Flickr" href="
 src="https://c1.staticflickr.com/9/8815/17889389448_75b11cf1a5_c.jpg" alt="Lens testing sample image" width="800" height="574" /></a></p>
<p>The trees and lake are so far away, without the spot-metering ability of the L-308s, how can I use it to effectively meter? <br>
I can understand with more expensive/advance Sekonic meters, they have a viewfinder that allows the photographer to spot-meter the spots they want. but don't know how to do that with the cheaper/less advance meter such as the 308s. </p>
<p>Thanks in advance,<br>
Khiem</p>
-
<p>Thank you everyone with your detail comments and constructive advice. I haven't been able to log on the forum for the last few days so couldn't answer straight away.</p>
<p>I went back to the same place, this time I used a (4 months expired) roll of Ektar 100 with my FE2 and the results are stunning. The weather was much better than the other day (when I shot and the results did not look sharp at all). Therefore, I can safely conclude the level of light also contributes greatly to details in distance. With more light, it resolves details better and hence give a better definition.</p>
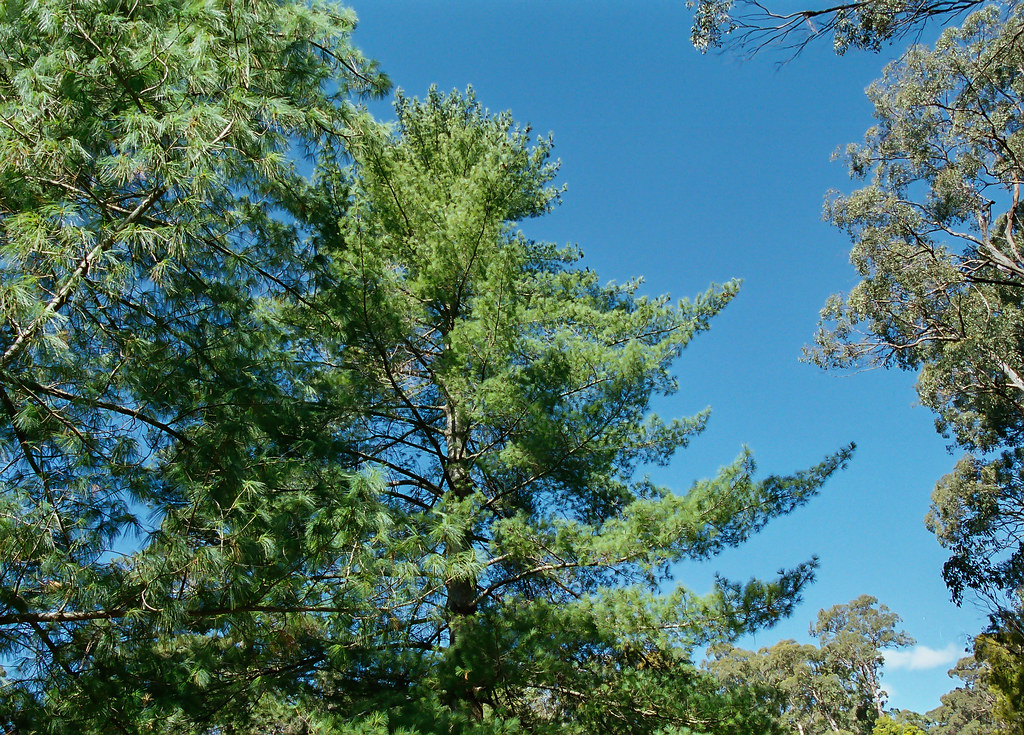
<p>This is a shot that was done earlier today at the same location. Bright sun-light, unlike the other day when it was wet and overcast:<br />Same setting, F100, 24mm f/1.4 G, Fuji Pro 400H, shot at f/7.1 <br /> <a title="Untitled by Khiem Le, on Flickr" href="
src="https://c2.staticflickr.com/6/5336/17454673084_587b5045be_b.jpg" alt="Untitled" width="1024" height="735" /></a></p><p>I also tried shooting with a roll of Ektar 100 and the results are stunning. This will be the only film I'll ever use for landscape. There is literally no grain. Colours are rendered beautifully, and the sharpness is, of course, top notch.</p>
<p>This is a few shots done with FE2, Ektar 100 and Nikon 50mm f/1.4 AI-S lens:</p>
<p><a title="Untitled by Khiem Le, on Flickr" href="
src="https://c2.staticflickr.com/6/5322/17889842410_b322554898_b.jpg" alt="Untitled" width="1024" height="735" /></a></p><blockquote>
<p>Lenses that don't have hard infinity stops simply don't have to have correct register distance, only that the autofocus is calibrated to the register distance. So they are easier to make. It's also possible for the autofocus to overshoot and go beyond infinity and then go back slightly. With a hard infinity stop there would be a mechanical barrier. So most modern AF lenses goes beyond infinity. On longer lenses, even manual focus ones, the focusing ring went beyond infinity to account for temperature differences. I have a manual focus Nikon 180mm f2.8 ED that is like that.</p>
</blockquote>
<p>Very informative thank you!</p>
<p>For more photos of today's shoot-out: https://www.flickr.com/photos/khiemnikon/</p>
-
<p>Thanks everyone for your inputs. </p>
<blockquote>
<p>Khiem, from your description, it sounds like your equipment and shooting technique should give good sharpness on the film. The other guys who have posted here about scanning will be of more help to you, I think.</p>
</blockquote>
<p>Mark: I thought so too. But after reading the comments and researching a bit more, I think film is not meant to behave like digital, pixel wise. The sharpness of film is probably defined a bit differently. So, it all comes down to the last variable, the scanning process. I got my films scanned at a supermarket lab before and the results were not even worth looking at. There were colour cast every where in the photos, all the colours are incorrectly presented, and sharpness was not even worth mentioning about. After that I changed to a different lab, a more customer-focused one and the colours were improved dramatically. So after that I understand how important the scanning process is. It can make a huge different. </p>
<blockquote>
<p>If you can find it, I suggest reading Ansel Adams' book "The Negative."</p>
</blockquote>
<p>Yep, ordered the book and still waiting for it to arrive ;-) </p>
<p> </p>
-
<p>Thanks Mark, this is exactly what I'm looking for. </p>
<blockquote>
<p>Some things to consider: landscape shots like your example may have allowed you to shoot at f/11 or f/16, which offers a lot of depth of field but may not be the sharpest aperture - you might try opening up a couple stops to see if it makes a difference.</p>
</blockquote>
<p>I didn't use f/11 or f/16 as I was worried about diffraction. Therefore I didn't' go north of f/6 or f/8. But do you think I should? I read the MTF chart from one of the many review sites, and they all show that sharpness decreases after f/6.</p>
<blockquote>
<p>Second, things in the far distance will be sharpest if you focus <strong>at or very close to infinity</strong>. If you set the focus at the <strong>hyperfocal distance</strong>, you'll get a lot of depth of field, but not maximum sharpness in objects at infinity</p>
</blockquote>
<p>This is exactly what I'm looking for. However, I'm quite lost at what you said, would u please explain again, esp the "hyperfocal distance" focusing. I'm not quite familiar with the term.<br>
What I did was to use auto focus and focused at the furthest tree. Now doing that made the focus ring on the lens turn to the "infinity" symbol in the little window, so I think I focused at infinity for the shot. I could still actually turn it up a bit more than infinity (i can see there is a marking of "16" pointing toward that position of the focusing that is beyond infinity), but that would make furthest objects out-of-focus. Why is it there, in what situation should I use that 'beyond infinity' focus? </p>
-
<blockquote>
<p>It isn't so much the body as the glass. Good glass helps you get a good image on film or sensor from the beginning and I've always thought it's better to get the very best image you can from the start and not rely so much on post processing or printing</p>
</blockquote>
<p>That's exactly right and I do think so too. However, the Sigma 35mm lens produces amazing results on my digital body, both at close and far distance. Therefore I was a bit surprised it did not make as sharp images with the 400H fuji film that I used for those shots the other day. It is still sharp, but definition is definitely no where close to it would have been on the digital body. <br>
</p>
<blockquote>
<p>You will lose something in the scan - I always do from my Epson 4990 - not a lot - but some. An optical print from the negative will most likely look different.<br /></p>
</blockquote>
<p>I asked the lady to do a high res scan for me, she did a pretty good job, the images are about 25mp and, to my eyes, the colours are very good too. You reckon we still lose a bit of sharpness even through higher resolution scan? </p>
<p> </p>
-
<p>Hi all,</p>
<p><br /> I recently migrated to film from digital (had a great time in that domain) and have been enjoying film very much. however, there is one thing I am still quite not sure about: I have the feeling the my shots done on film are not quite as sharp as if it was done on my digital body. this must be a very common question for newcomers who recently migrate from digital.</p>
<p><br /> To be more specific, shots that make me wonder about sharpness are landscape shots, where things are at infinity and where there are a lot of small details further away (leaves, tree branches, etc.). With digital, it can be quite easily to get a reasonable definition/sharpness for details that are that far. With the shots done on film, I have to crank up the "sharpener" in pp a bit. A friend told me that because the lab didn't want to do any sharpening at all at their end, they want to leave the shots as 'original' as possible, whereas in digital, the camera itself does a bit of sharpening every time the shot is made. That sort of makes sense, but is it true?</p>
<p><br /> This is a shot that was done on a F100 body, with Sigma 35mm f/1.4 lens and Fuji Pro 400H film:
- I had to crank up sharpening quite a bit to achieve the definition that we can see from the photo. I mean it doesn't really bother me, but I jsut would like to know if there is anything that I did wrong or it is what it is.</p><p><br /> Another reason that I could think of is because I've been shooting with ASA/ISO 400 film. Is slower film supposed to be sharper, capture more details? from what I've read, 400 is not meant to be for landscape anyway. Is that true?</p>
<p>From what I observed sharpness is totally fine with object that is closer to the camera, for example: close-up, portraits, etc, but not so much with objects that are further. Would slower film solve this?</p>
<p>Thanks in advance for your inputs. <br /> cheers</p>
-
<p>Thanks and I am so glad I've been received a lot of constructive feedback and comments from this community. Really appreciate it! </p>
-
<p>Thanks Lex. <br>
This is another shot done at box speed and scanned at a proper lab: <br>
http://i61.tinypic.com/2eevivs.jpg</p>
-
<blockquote>
<p>Nope. Fuji color negative film, even their low priced Superia and Superia X-tra, are very good. Any competent minilab should be able to deliver neutral color. If anything I find Fuji color negative film tends toward over-saturated greens in foliage. But it should never be magenta, unless the mixed lighting is impossible to overcome - such as a mixture of metal halide, tungsten, fluorescent and halogen in the same shot.<br /></p>
</blockquote>
<p>You are right. I tried shooting again with a whole mix of different indoor lighting and the result does not look that bad at all. I used a different lab thought. This is what it looks like: </p>
<ul>
<li>http://i61.tinypic.com/2s5y8up.jpg</li>
<li>http://i58.tinypic.com/709yqu.jpg</li>
</ul>
<blockquote>
<p>...First off always use film that has not expired. (Was yours expired?)...</p>
</blockquote>
<p>Yea Alan, the film I used for those shots expired a few months ago. I did realise that when I took it out and loaded to the camera, and I thought a few months after expiry would not make much different. I think this contributed more or less to this issue. Thanks for the advice re bracketing. Since starting shooting film, I haven't really thought of using bracketing but it is actually a very good idea. Used it all the time before on my digital body to shoot HDR. <br>
Re Exposure books: do you have any recommendations? I find it a bit harder to find books or material regarding exposure for shooting films. I've shot with my fullframe digital body for quite some years now, but when it comes to shooting film, getting the spot-on exposure is a bit harder than I thought. Even when using auto meter. </p>
<p>Thanks everyone for your inputs. I've shot another roll and tried getting it scanned at a different lab and am quite please with the results. Therefore it's quite conclusive that the grocery store lab did quite a bad job, probably at developing the film as well. </p>
<ul>
<li>http://i59.tinypic.com/11awvio.jpg</li>
<li>http://i60.tinypic.com/fxurrt.jpg</li>
</ul>
-
<blockquote>
<p>Although as you said if you use f/1.4 in sunny day with ISO 400 it would surely be overexposed as the camera do not have a high enough shutter speed. But looking at your pictures I can't see any sign of overexposure. I am sure all of your pictures can be scanned darker.</p>
</blockquote>
<p>I think this is what happened too. </p>
<p>Also, I'm a bit confused about the process of developing and scanning film. So people seem to agree on the fact that each lab will give a dramatically different scanning result, due to the setting they use with their scanners, staff, training etc. However, is the very first step of the whole process (develop films with chemicals) standardised? i.e is developing film the same process in terms of quality, everywhere? Reason is I've been thinking about getting myself a scanner, but if the film developing process is also another factor to consider, it'd be a bit more difficult to eliminate all the variables. </p>
-
<p>Thanks everyone for your opinions and advices. From most of the comments, it looks like the lab I used was the one who caused the magenta cast over the photos. </p>
<p>From a few rolls that I got back from this Grocery store lab, It does look like shots that are done indoor/under shade area/lack of direct light always get that magenta cast? Is that a typical thing that can happen? With shots that are shot under bright direct sunlight, the magenta cast almost disappeared. This is an example shot: http://i62.tinypic.com/1zqek9i.jpg</p>
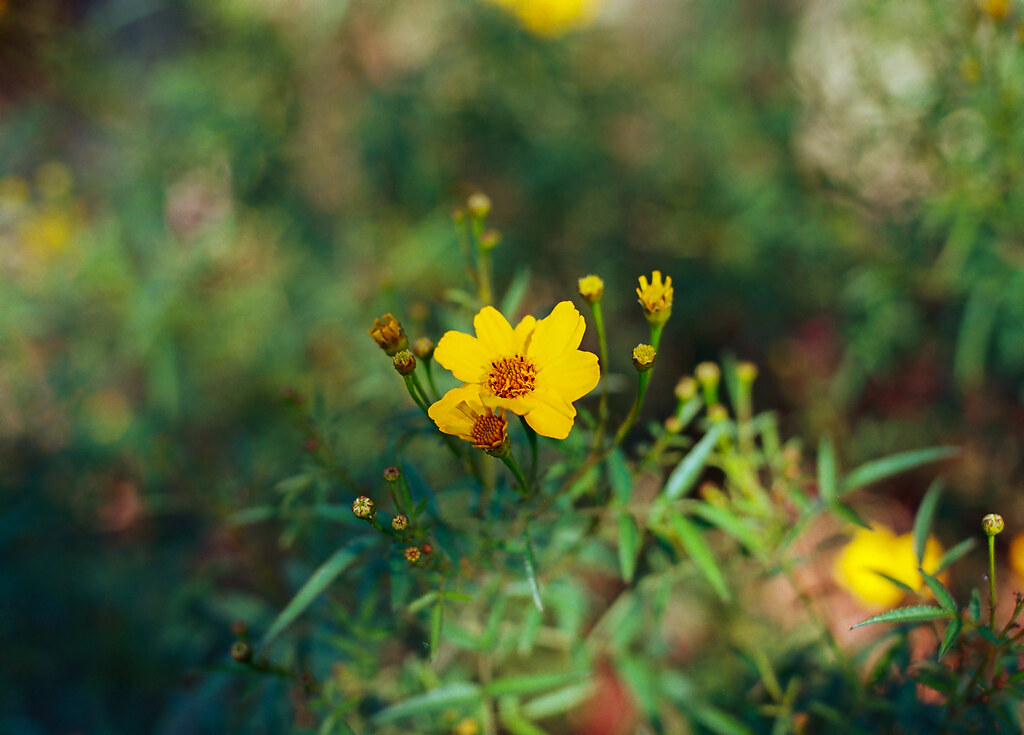
<p>Also, like some of the members said, using wide open (at f/1.4) on a sunny day is probably a not good idea and that also might have caused the flower shot to be a lot over exposed. </p>
<blockquote>
<p>Is the lens by any chance an AiS 35mm f/1.4 lens? The first photo looks rather typical of that lens' behaviour wide open, plus I'd say it is a bit overexposed (ISO400 film, bright daylight and f/1.4 do not mix well).</p>
</blockquote>
<p>It's a Sigma 35 f/1.4 lens, but I guess it'd be similar to the Nikon AI-s. <br>
<br>
</p>
-
<p>Hi everyone, <br>
I'm quite new to 35mm film and trying to learn and practice as much as I can, but the more I shoot the more confused I become. Please shed some lights and excuse me if the question(s) have been asked many times before. <br>
From what I know, neg print film has high/broad latitude, which allows a great deal of overexposure. People tend to overexposure a bit to preserve details of the shadow without worrying the highlight being burnt out like in digital. Knowing this I have been overexposing my shots by setting ISO on the body to 200 while using 400 film. About 70% of the times, the photos came out a bit washed out and seemed like it has a hazzy layer on top, which made the photo look quite unsaturated. Please have a look at this particular one: <br>
1. http://tinypic.com/r/5n7les/8<br>
It was shot under normal bright sunlight, at 35mm and f/1.4, in A-mode of a Nikon F100. Fuji Superia 400 film was used. Body was set to ISO 350 (or so). I notice the strong red colour of the flower wasn't very saturated in the photo and the whole photo just looks like there is a colour cast over it. <br>
This is another shot of the same roll: <br>
2. http://i58.tinypic.com/28akm6h.jpg<br>
It was a very bright day and it was shot at f/5 or so and also +2/3EV, so I can't understand why is still not clear and crisp. <br>
I suspect it is the lab's fault that the photos look like it has a magenta cast over it. Look at this shot: http://tinypic.com/r/2n3wbm/8 it can be easily seen that there is magenta case all o ver it. <br>
All those shots were scanned by a lab in a general supermarket here in Australia (BigW). It isnt' a professional lab or anything. <br>
So my final question really is: Where does that magenta cast come from? Is it from the lab? Is it because of the film stock I used? Is it because of the exposure that I used (in this case, almost +2/3ev to +1ev)? or is it because of the lens (which I highly doubt because the lens performs perfectly normal on my digital body)?<br>
Please shed some lights as I'm quite confused what have I done wrong. <br>
Thanks, <br>
Khiem</p>
-
<p>Hi Robert, thank you for quoting the two previous posts. With regard to the GoldenRod, according to its explaination of how the system works, I can partially understand why we may need air circulation in the container. However, I doubt that we may need that system just for camera or optical equipment storage. I don't see a point where heating up about several degress higer than outside tempeture is going to be more beneficial for storage of optic equipment than just using simple dessicant. The concept of forcing the moist air outside the container seems resonable, but I think heat might not be too good for the camera, esp in the countries where the average ambient temperature is already quite high (tropical countries for example).</p>
<p>Why don't we just use the traditional method of placing the silica dessicants inside an air tight container? All we want to acheive is to maintain the dry-box at certain RH level and silica can do this job well. </p>
<p>Back to my question, is 25% too low that gonna do some damages?</p>
-
<p>Thanks all for your opinions,</p>
<blockquote>
<p>I <em>believe</em> that it is only necessary to remove the rear group (actually a single element convex lens). IIRC, a spanner is not required, only a high-quality precision screwdriver. You will then have access to the damaged surface, and can clean off the fungus with a lens tissue and a few drops of methanol (Eclipse® fluid).</p>
</blockquote>
<p>Hi Les, I have just opened and took out the rear element of this 135mm f/2.8 AI and clean it. It was not too difficult to get the element out (the glass is actually attached to a tube, so im not sure if it's called a group or an element, there's only 1 piece of glass though). The fungus was a bit mild, so it was not too difficult to clean using just simple and gentle lens cleaner. Cleaning without leaving streak on the glass is not too easy though. Everything is intact again, photos can be taken, but not sure if anything gonna happen in the long term. I just store it in a separate air tight box with silica inside anyway, just to be a safe side, prevent it from spreading the fungus to others.</p>
<blockquote>
<p>Is the weather stipping a rubber tube or foam? If it is foam and easily compressible, then it is likely open cell foam.</p>
</blockquote>
<p>Hi Jim, mine is the foam and yes, it is easily compressed. Thanks for the idea and I'll try to get some closed cell foam for my drybox. That was what I intended to buy too, but I just couldn't find a way to describe it to the guy at <em>Bunning Warehouse</em> at my place.</p>
<p>With regards to the relative humidity (like in my question at the begining), do you thinking 25% is too low and that is likely to cause damage? Or is it the lower the better, as long as not any lower than 5-10%?</p>
<p>P.S: I now have the habit of examining all my lenses to see if it had caught any of the fungus from 'the neighbour' :'( whenever I open the box.</p>
-
<p>Thanks, Luis, for your opinion about isolating the affected lens.</p>
<p>I also stuck the weather strip around the edge of the lid to isolate the box and prevent humidity going inside the box when it's close. That is why after closing the box, the RH is usually stabilized at 25-26% and it hardly goes up unless I open it.<br /> I've been using this box for about 2 months and the silica gel is still working great (judgment is based on looking at the silica particle, if it absorbs moisture, it becomes very shiny and wet; and the ability for it to maintain a certain RH). I think I am ok with the box construction. Thanks for the keyword you gave me, I will search more on this forum to find more about this. The (only) other thing I am not too sure (as mentioned at the beginning) is if the RH that I'm having now too dry for my equipment which can possibly causes some damages in the future.</p>
<p>Khiem</p>
-
<p>Thank you Chris for your answer.<br>
I am 95% sure it's fungus, cos it looks like what I can see from typing "fungus lens" in google, but this is a very mild case.</p>
<p>I am about 70% sure it's inside, because I tried to touch & remove it with the cotton tip but nothing moved so I think it's inside. So, fungus is usually outside, not inside the element?</p>
-
<p>Hi everyone,<br /> So, here is my story:<br /> Recently, I got a used 135mm AI from ebay and noticed there is quite a bit of fungus on the lens (too late, i left a positive feedback before checking the item carefully, this is a valuable lesson for me). The affected area is on the rear element and I think it's inside! However, it's not too big (and not too unnoticeable): it's a circular area with the diameter of approximately 2mm located on the edge of element.</p>
<p>I haven't thought too much about fungus since I started the photography hobby, but until now, after getting a fungal lens, I feel a bit unsecured. I understand spores are everywhere in the air, and fungus only start to grow when it has enough humidity and nutrition, but the fear of the fact that this lens will spread the fungi to my other (unaffected) lenses just keeps bugging me. So, I just have a few questions regarding this:</p>
<ol>
<li>I store all my equipment in a DIY dry-box, so is it ok to store the affected lens with other lenses and the body in the same box? What is the likelihood of spreading the fungus to other lenses? </li>
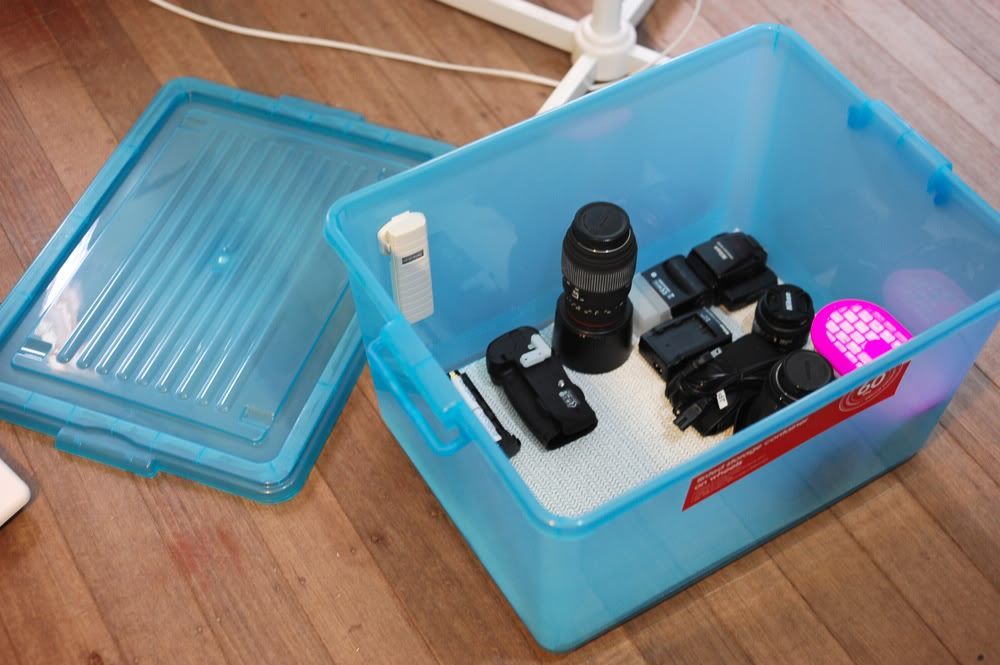
<li>My drybox was made by putting quite a few of silica desiccant into a 60 litres airtight box and a hygrometer was also put in there. After placing about 2 brand new boxes of <strong>DampRid</strong> into my 'home-made-dry-box', the relative humidity drops from 60% to something like 26% in about 5-7 hours and is maintained at 25-26%. At first, I thought this relative humidity (RH) is ok, but after reading quite a few online articles, some recommended to stay between 30-40%. So, my question is: is somewhere from 25-30% ok? Is it too dry? Have you ever seen any case where the lens' rubber part or lubricant being dried out? This is what my dry-box looks like <img src="http://i287.photobucket.com/albums/ll139/4changbatluc/Adelaide%20trip/DSC_2175.jpg" alt="" width="1000" height="665" /></li>
<li>I placed the affected lens in a smaller box (20x10x5cm) and place a smaller pack full of silica desiccant (5x10cm) inside. My hope is to make it as dry as possible to stop the fungal growth and hopefully it kills the fungus. I know it's kind of impossible to kill it completely, but I hope it just does not keep growing. My question is: putting quite a large amount of silica in a relatively small box will make it a bit dry, I guess the RH in that smaller box would be something less than 20%, so is this safe for the lens? I need to balance the risk of fungal growth and the risk of drying out the lubricant of the lens or its rubber part. Since I got this lens quite cheap actually, $100 incl. shipping to Australia, I wouldn't want to spend couples of hundred to get it cleaned. Do you have any "trick" to remove the fungus? </li>
<li>I heard people saying placing the lens under the sun for hours can possibly kill the fungus, some also say this can damage the coating, what do you think? </li>
</ol>
<p>The humidity here in Adelaide, Australia is not too humid compared to other tropic countries. The environment RH is about 60 to 65% and this is not good for optical equipment, therefore I think storing equipment in a drier place is an essential thing to do.<br /> Thank you in advance for your opinions,<br /> Khiem</p>
-
<p>Hi Kevin, welcome to photo.net, i'm from Australia too :).</p>
-
<p>Hi Gene, I also own the 16-35 so I would like to share my opinion: I think renting a 16-35 for $110/week is quite a reasonable choice (Here in Adelaide Australia, they quoted me for something like $70-$90 a day). When stopped down, the sharpness at 16mm is actually quite good. Distortion, in this situation, is quite high at the wide 16mm end, however I guess it is not something that you can't fix or it would greatly affect your IQ. Some may want to avoid the 16mm end and shift up to something like 20mm, this is still very wide on your d700. IQ (sharpness and contrast) at other focal length of this 16-35 is also very high. I guess you'll at least use f/5.6 or more, so you may not need anything faster than f/4 (for this particular situation). A neutral density (ND) filter is also something that you may need to use to create some "water effect".<br /> <br /> Nikon 24-70 is a perfect lens in terms of its sharpness, contrast however you might not need anything further than 30mm and sometime you'll need something a bit wider than 24mm, therefore renting this more expensive lens would be kind of 'too much'.<br /> This is just my own opinion, hope this helps.</p>
-
<p>Sorry for digging up an old thread, but I've got this problem with my old lens and I'm wondering will this fungus thing spread? i.e. onto another lens? Since I keep them all in the same container (airtight with silica gels) and I'm not sure if the infected lens gonna affect the others? What do you think?</p>
-
Thanks, everyone for your opinions. Very much appreciated!


Commlite adaptor and Nikkor 24mm f/1.4G ED
in Sony/Minolta
Posted
Hello everyone,
I'm about to purchase my first mirrorless/Sony camera ever and am looking at using Commlite adapter for my existing Nikkor 24mm f/1.4G.
Just wondering if anyone has used the particular system A7iii with Commlite V06 with Nikkor 24mm f/1.4G ED and if you could please share some opinions about the system?
The lens is listed as 'Compatible' on CommLite's official website, but i'm just wondering if someone could please share some insights :)
Cheers