

skip_kempe
-
Posts
58 -
Joined
-
Last visited
Content Type
Profiles
Forums
Blogs
Events
Downloads
Gallery
Store
Posts posted by skip_kempe
-
-
<p><a href="http://www.ilfordlab-us.com">Ilford USA</a> has had a lab running for a few years now. It's a bit expensive, but obviously prints on Ilford silver gelatin paper, though I think from digital scans. <a href="https://thedarkroom.com">The Darkroom</a> prints on Ilford silver gelatin paper also, and I think North Coast too. There's bunches of places. But these are all from digital files. I'm sure you could find places that would print from negatives, but then you're asking someone else to make all the creative decisions regarding the print—exposure, contrast, etc. My decision a while ago was that if I'm sending film out to get printed—color, black and white, whatever—I might as well maintain as much creative control as possible, which means having all my negs scanned at development, paying a hundred bucks to get a USB monitor calibration setup so I can manipulate color, exposure, contrast, etc. in Lightroom, and having the files printed without the usual "enhancement" that most labs like mpix like to include automatically to make the garishly bright photos that stand out to the hoi polloi.</p>
<p>So that's where I'd say an online quest for optical film enlargement services breaks down—not necessarily with the quality of the final product compared to a digital scan, but with the lack of creative control retained in that process.</p>
-
<p>Your post was fun to read, Brad. Thanks!</p>
<p>(And regarding Velvia, I once read somewhere on the internet a less kind description of its effect— "as if clowns vomited all over the negatives.")</p>
-
<p>Please do yourself a favor and don't buy a new FM10. As everyone is noting, there are <em>so many</em> good used film cameras out there—in fact, I'd say that's one of the benefits of shooting film: you can buy a wicked-old camera, throw some fresh Portra 400 into it, and you're taking some seriously good pictures.</p>
<p>I'll throw in a plug for the <a href="http://www.mir.com.my/rb/photography/hardwares/classics/nikkormat/index.htm">Nikkormat/Nikomat cameras</a> Nikon made from 1965-1977. These are rock-solid workhorses in my opinion. Manual focus, so if you're set on AF, never mind. Bodies are on KEH from $25 to $50 (at the high end—I know!). I used an FTn as old as me for ten years or so, then moved mainly to an EL five or so years ago to relax a bit with that modern convenience of auto exposure. These things are solid, reliable, indestructible. Lenses for these cameras can be especially cheap, since they can take NAI (non-exposure-indexing) lenses that have a limited market now as the FMs and beyond can't take them without possible damage. (There is a pin and horse-shoe type design that you have to manually set with two quick twists when mounting the lens to tell the camera meter the lens's aperture range.)</p>
<p>That being said, I'll also add that you should ask your sister if she's actually using the Leica, and if not, offer to help keep it in good working condition by giving it some use.</p>
-
<p>OK, now I have a question. If labs are requesting that I not embed my images with the ICC profiles (and I assume that by this they mean, for example, don't export from LR using the profile), I'm supposed to simply use the ICC profile for "soft proofing" which I didn't know about in LR before. According to this workflow, I'm supposed to edit my actual image specifically for the printer profile of a particular printer (say, Costco or North Coast Photo or Mpix or wherever). I had been operating under the assumption that I should use my calibrated monitor to get the photo to look exactly the way I wanted it to look, then output using the profile for the specific printer I was using.</p>
<p>The problem with the soft proofing seems to be that I now have to specifically adjust my photo for each particular printer I might use, instead of doing it once on a calibrated monitor, getting it to look how I want, and then having the export/publish engine in LR apply whatever specific adjustments are necessary to keep the final print in gamut with whatever printer I'm aiming for at that time. Am I understanding this correctly? If so, this seems like a real problem, as it will require me to go back and readjust images anytime I want to print them based on new or updated profiles for whatever printers or output media I might use in the future.</p>
-
<p>I use mpix.com for prints. They have an ICC profile hidden somewhere on the website that I probably couldn't find again if I needed to, but I saved the profile into Lightroom and export everything that I send to them using that. Then when I order, I make sure to check the box that says "Do not color correct" and then double-secret affirm that I really, really don't want any correction. You actually pay less for their "proof prints" this way.<br>
The color has worked great for me this way so far.</p>
-
<p>Hello film people!</p>
<p>Here's <a href="http://www.nytimes.com/2015/01/18/sports/ncaafootball/a-game-of-juxtaposition.html">a cool article</a> I'll point you to, by NY Times photographer Cooper Neill, in which he tells about bringing along (in addition to his digital kit) his Nikon 35mm film camera as the sole NYT photographer at the game. He used it to intentionally double-expose an entire roll of film, in the process hoping to</p>
<blockquote>
<p>juxtapose different aspects of an event in a single frame, hopefully enhancing for the viewer the sense of what it is like to be on the scene.</p>
</blockquote>
<p>Just kind of cool; that's all. There's a slide show accompanying the article with a few of the images.</p>
-
<p>I'll agree that North Coast Photo is a fantastic place to have your film processed and scanned. I've tried probably a dozen or more different services over the past dozen years or so, and I settled on NCPS a while back. It comes down to the simple fact that I don't need to go through and spot out dust or hairs or pinholes on lots of frames in Lightroom. Scans are just perfect and sharp, which saves me time and worry. It's around $18-$20 for d&p and hi-res scans per roll, but in my opinion really worth it in the time and worry saved on my part. I mail my film from the east coast to NCPS in California; if you're looking for high quality scans, unless you live in a big city the only realistic option is to mail it wherever the best work is done.</p>
<p>As far as the redundancy of shooting film and then scanning to digital is concerned, since I'm not personally printing in color chemistry and thus controlling all aspects of the final print, my feelings are that since I love shooting film, it makes more sense to scan to hi-res digital and adjust stuff in LR and print via electronic files. Yeah, shooting digital would allow that level of personal adjustment of the final image, but film is what I know and love for lots of reasons so it's actually pretty cool that digital technology lets me control my final film images in a way that I couldn't have done before, in the days of simply sending out negatives saying "print frame 13-A 8x12" and waiting to see what it looks like.</p>
-
<p><strong>Thank you</strong> for the notch idea! I have a new (to me) Nikomat EL as well as the Nikkormat FTn that I've been using for a decade now. I always tag my scans in Lightroom with the camera that shot them, which worked fine when everything was a different format (35mm, 6x6, 6x7, 6x9) but this system broke down once the two Nikons got in the mix (not to mention my wife's FM2) and I wait until I have several cans of film to mail across the country to NCPS. I think I just may try this out—I'd never heard of the idea before.<br>
Btw, <a href="http://farm3.static.flickr.com/2303/2145101272_920bba7ea1_z.jpg?zz=1">here's a good photo</a> I found of some (somewhat excessively large) notches.</p>
-
<p>Those are perhaps the best "demo" shots I've seen. Thanks for sharing! The exposures are particularly impressive; how did you go about metering?</p>
-
<p>I've been sending out to <a href="http://www.northcoastphoto.com/film_developing_scans.html">North Coast</a> for two or three years now and am extremely satisfied. Quality is superb: no scratching ever, in dozens of rolls. I haven't had to spend time cloning away any dust spots or hairs either. It's totally worth it, though it'll be more expensive than Costco. The time I save not cleaning up the scans is certainly worth the money. Plus, the enhanced scans are giant. </p>
-
<p>Wow. Thanks, QG!</p>
-
<p>Thanks, Q.G., for clarifying some of my points, though now <em>I'm</em> a little confused. I certainly wasn't clear about the "focal plane," since that refers to the optical spot in the camera where the light focuses, and which would always be the same regardless of what is or isn't loaded.</p>
<p>As far as adjustable plates go, I looked in my Contax manual before responding to Artur above and it does state that one of the problems caused by incorrect setting of the pressure plate is film "out of focus." I understand what you're saying about the plate only needing to exert the right pressure to push the film forward against the frame in the camera, but wouldn't manufacturers understand this? And mightn't a back set at 220 exert slightly <em>too much</em> pressure forward that could create excessive friction on 120 film with paper backing that would needlessly stress the transport mechanism or motor?</p>
<p>I'd never thought about frame spacing as you mention, but that makes total sense. So is this true for all cameras? Does every single camera using any sort of roll film (35mm, 6x6 TLR) adjust its film advance mechanism as the roll progresses from the first to the final frame to account for the greater thickness of film on the takeup spool?</p>
<p>(Of course, this all begs the question that without the [220] vacuum back on the Contax, 120 film is sometimes out of focus anyway allegedly due to having sat too long tightly curled up or something. I think the reason may be in question, but I've personally seen it: photos with several objects across the frame, at the same focal distance, out of focus for about 1/3 of the frame at the edges but OK in the middle, as if some sort of tilt/shift had been used.)</p>
-
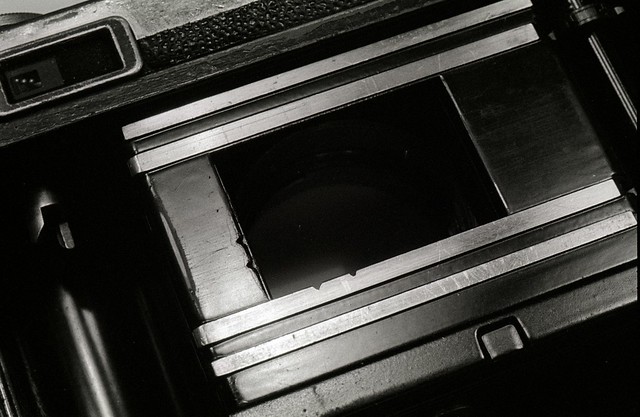
<p>Hi Artur. The Contax 645 should function with 120 film loaded in a 220 back. As Charles implied, the only difference in the back is that the pressure plate is set ever so slightly differently due to the fact that without the backing paper, the focal plane will lie slightly further from the lens for 220 film.</p>
<p>The camera has no way of knowing that you have 120 vs. 220 film loaded. In fact, on the "120 back" (really a 120/220 back) you can rotate the pressure plate around (that's the shiny flat part that the film lies next to) so that the arrow indicates either 120 or 220. The difference as I mentioned is to account for the slightly greater thickness of 120 film due to the backing paper.</p>
<p>There is some debate over whether or not this difference really matters. Certainly, if you are focusing things tack-sharp with a really wide-open aperture, the focus might be a little bit off if you have 120 film in a back set to 220. But if your depth of field is great enough, perhaps that will cover the difference.</p>
<p>But again, the camera doesn't know what's loaded (it trusts what setting you turn the arrow to, or in the case of the 220-specific vacuum back, it always assumes 220). So if you have 120 in a 220 back, it will expect to have 32 exposures available, when in fact your 120 film only holds 16. In this case, just shoot like normal for 16 shots, then fire off the rest until you hear the film flap around loosely inside...maybe that's 8 more shots or so? Obviously there is no actual film left, just backing paper, so you're not wasting film. If on the other hand you had 220 loaded in a 120 holder, it would get to 16 exp and then spin forward to the end of the roll—though there will be extra length involved so I don't know if it'll keep going to the very end or just leave you still in the middle of the 220 roll. You'd know if it got to the end because you'd hear the film flapping a couple times.</p>
<p>BUT your question was really "why isn't the camera functioning when loaded?" Since your friend is new to the camera perhaps he hasn't quite figured out everything to keep on top of. Some quick things to check:</p>
<ul>
<li>I assume you've tried brand new batteries; do you see any readouts at all in the viewfinder?</li>
<li>The main thing I wonder about is whether he's removed the dark slide. There's a little grey handle that sticks out the left side between the camera body and the front of the magazine; as a safety measure, the shutter will not fire if that's not removed, because obviously no film would get exposed while that's in place. Sometimes I'll be distracted by everything that's going on and forget about the slide after loading a new magazine, and it'll be a few minutes before I realize, "oh yeah, duh. Pull the dark slide out."</li>
<li>How is the film speed set on the side of the magazine? If your friend has the speed set to "—" instead of the actual number (400, 160, whatever), the camera automatically sets the speed based on a bar code printed at the beginning of the film roll. If the bar code indicates that 120 film is in a 220 magazine, the camera won't work and 120 then 220 will blink on and off in the viewfinder. You could probably fix this by turning the camera off and setting the film speed dial manually.</li>
</ul>
<p>Finally, you could just go into a bathroom with the camera, put a towel at the bottom of the door, open the film magazine and snap open the film spools so that you can wind the film tight again. Then turn on the lights and do it right: put it on the 120 back. And now that I've typed all this, that's probably the best thing to do anyway, although I do see it's a few days later so maybe he's figured it out by now. Incidentally, there's not a lot of film available in 220 these days; mostly Kodak Portra I think for the few wedding folks left on film.</p>
-
<p>Actually, you can open the disposable camera in the light, which I've done several times just out of curiosity: just pry it open where you see the tabs that lock it closed (often these are underneath the label, so you'll need to peel it off around the edges). You generally need a thin, flat screwdriver to pry the tabs apart.</p>
<p>You don't need to worry about a changing bag because you'll find the film all rolled up in a normal, albeit minimally labeled, film can: the film starts out unwound and winds into the can as you shoot, which is why they don't ever rewind at the end.</p>
<p>But this whole process would be much more enjoyable, in my opinion, if you used those Ilford true B&W disposable cameras (loaded with 400 speed HP5+ film, I think).</p>
-
<p>I had been doing the mail order "process/scan/proof prints" thing for a while. Uncorrected proof prints are usually 20-some cents each at the time of processing with most decent (pro) online processors.</p>
<p>I used to always file the proof prints or put them in family photo albums. But over the last few years, I've begun using Lightroom more as the place where I review prints for potential reprinting (that is, as opposed to my binders full of proof prints). Then I started noticing that the color cast in many of those proof prints was really off, which is to be expected since they're uncorrected, but this made them useless to put in family albums either.</p>
<p>So now, I just develop/scan my film. I order the enhanced scans from North Coast, across the US from me in California, which are a little expensive but the quality will make them sufficient for any 8x10 or maybe 11x14 enlargements I'd want in the future. Plus, they are absolutely free of dust spots, hair, and scratches, which saves me a lot of mindless cloning-tool time. My goal is to use my color-corrected monitor to ensure colors are how I want them, and then send out select prints to Mpix or someplace for uncorrected 19cent prints that should have the colors I actually want to look at. These prints will be the ones I populate my family photo albums with, or use for proof books or what-not. Or I suppose I could also do the online photo-book-printing thing too, but I haven't fully turned that corner yet.</p>
<p>I do this for 35 and 120. The quality of these scans is amazing, especially when you've got 6x7 or 6x9 negs. And FWIW, Portra 400 requires almost no color correction for my eyes. I used to think Fuji 160C was so awesome, but after the necessary switch I realized how much time I'd spent tweaking color levels with that film.</p>
-
<p>Keep in mind, too, that standard fireproof safes are generally designed to keep <em>paper</em> safe for however long they are rated for. Paper can obviously withstand much higher temperatures than hard drives. So if you are backing up to external hard drives, and especially if you are doing so and keeping them in the same location as your computer, you need <a href="http://www.fireking.com/adesco_safes_data_mediavault.html">a fireproof safe rated for digital media like this</a>. A few companies make fireproof safes like this that somehow allow you to plug directly into your hard drive through the enclosure, so you don't even need to take the drive out. I would think overheating might be a problem with that setup, but I've seen some that have some sort of baffled venting system that's supposed to address that.</p>
<p>Also, if you're into external drives, I'm a huge fan of buying a bunch of plain BARE internal drives, and simply using a docking station like the <a href="http://eshop.macsales.com/item/Newer%20Technology/FWU3ES2HDK/">NewerTech Voyager Q</a> to connect each one individually to my computer when I'm backing up to that drive. I started doing this when I read a comment once that external drive manufactures are really only drive <em>enclosure</em> manufacturers, since the actual drives inside are only made by a few companies like Seagate and Western Digital. Another benefit of this method is that bare internal drives take up much less room in your fireproof media safe.</p>
-
<p>Indeed; the slits are for the 220 vacuum back. The good news is, some think the 120 back doesn't always do a super job of flattening the film which leads to slightly out-of-focus images especially along the long sides. So your 220 back will solve that problem for you! Unfortunately, the bad news is that you're stuck with the very few films made in 220 now—Kodak Portra is what I know of off-hand. The other bad news is that 120 backs used to be available for around $70 on KEH a few years ago but now they all seem to be upwards of $200.</p>
-
<p>I've had great luck with <a href="http://www.photoworkssf.com/services-and-rates/mail-us-your-film">Photoworks San Francisco</a>. The owner has a pretty cool <a href="http://photoworks.wordpress.com/">blog</a> which makes it clear he really cares about film, including alternative processes and lo-fi film stuff like shooting with Holgas and the new Impossible Polaroid films. It means a lot to me when an owner these days still cares about film, and not just running a website that sucks in and processes digital files. Photoworks' quality was excellent and film always came back perfect.</p>
<p>However, I've mostly switched to <a href="http://www.northcoastphoto.com/film_developing_scans.html">North Coast Photographic Services</a> based on numerous recommendations here on Photo.net. The reason is that their enhanced scans are crazy high quality, and the film processing quality is as great as described above. I should add, though, that I've recently stopped ordering a set of low-cost "auto-corrected" proof prints, as the color casts have been really bad recently. (I assume color would be fine if I paid for their higher quality more professional prints, but that gets expensive if I want a full set of 37 prints from the roll.) It seems cheaper to get the processing and enhanced scans, make sure the color looks good on my calibrated monitor, and then use mpix or someplace to print them out cheaply w/o color correction on photo paper.</p>
<p>Btw, I'm mailing my film from the east coast. I used to use a lab in Connecticut, but they sent back film with scratches once too often. I did a ton of research comparing prices, quality, and what-not (I have a folder of tabs on my browser that scrolls off the screen!) and ended up happy with Photoworks SF until I tried the scans at NCPS. I'm sure I could find similar film processing quality more local to me, but the consensus seems to be that NCPS' enhanced scans hit a quality/price ratio that can't be beat.</p>
-
<p>Here's a sample...</p><div>
 </div>
-
<p>I've used the same stuff—I assume you got it from Dean Bennici in Germany?</p>
<p>I ended up with the obvious red foliage that it sounds like you're looking for. I had it developed in E6, used a #12 yellow filter, and rated it at 400 ASA as recommended. He says you <em>can </em>cross-process in C41 to get a negative, but that's not what I did and I don't believe that's what's recommended to get the typical infrared look.</p>
<p>So I think you should develop in E6; I can't imagine that simply using a deeper yellow filter will completely change the outcome as much as you want. (see sample image in the next post...)</p>
<p> </p>
-
<p>Kodak Portra 400, which replaced Fuji NPC 160 for me and which I've found far superior ever since. It's totally my favorite right now: it's so good that I just can't handle shooting anything else, even though it might be much cheaper. I'm also testing some Portra 160 in a camera right now.</p>
<p>Ektar 100 when I'm only thinking about landscapes, but I might be content just sticking with the Portra 400.</p>
<p>Ilford HP5+ for black & white. I wasn't happy with Kodak ditching some b&w emulsions so I figured I should get used to a non-Kodak b&w rather than spend time shooting a Kodak film that they'll also drop in a few years, so for me that meant a switch from Tri-X to HP5+, which also means supporting a company like Ilford that seems to actually care about b&w.</p>
-
<p>I'm all for alternative processing ideas, and trying new and unusual things, so I once thought it'd be really cool to shoot expired film to get a dreamy and surreal look also. I even considered leaving a few rolls of the cheapest Kodak consumer-grade 200 speed color film on my car's dashboard for a year or two to get nice and warm.</p>
<p>In reality, I found that shooting expired film just makes really crappy pictures. The color is off, but not in a dreamy or surreal way. The grain becomes exaggerated. In retrospect, maybe a better idea would be to shoot and process normal film, but then speed up the process of letting the color dyes fade by leaving the exposed film in the sun for a while. If you really want to try shooting exposed film for surreal/dream effects, try it with a normal easy-to-process c-41 film first. Or shoot <a href="http://www.bennici.net/">Kodak Aerochrome</a> (color infrared) and cross-process in e-6 if it's surreal you want! (But it's only available from <a href="http://www.tarquinius.de/index.html">this guy</a>.)</p>
-
<p>For me the kicker these days is the importance of getting good scans with my processing. I started using North Coast several months ago (mailing my film cross country from the Atlantic Ocean to California) and haven't had to waste time cleaning up dust spots or hairs ever since, and their premium scans are just large and awesome.</p>
<p>I wouldn't mind processing on my own, but these days I like everyone else want scans to post to the e-web and and the word on the street is that you can basically spend all your time learning how to do perfect scans. I'd just rather spend my time doing other things than managing a quality scanning workflow.</p>
-
<p>This is an amusing thread. Thank you, gentlemen and perhaps -women.</p>

Medium Format that leaves digital imprint on Film like this?
in Medium Format
Posted
<p>I second the answer that a Contax 645 prints this data along the edge of the film. The "M" means manual exposure (as opposed to Av or Tv).</p>
<div> </div>